Creating my own tack has always felt like an extension of my horsemanship. It allows me to tailor gear exactly to my needs and the needs of my horse. One of the most satisfying projects I’ve taken on recently is making DIY rope reins with knots for grip. These reins are easy to customize, durable, and surprisingly simple to make, even for beginners. Whether you’re looking for reins that offer better hold during training or a colorful, budget-friendly option for trail riding, learning how to make your own can be a game-changer.
Store-bought rope reins often come at a premium, and not all of them include grip knots, which I find essential for control, especially when riding in varied terrain. Making my own DIY rope reins with knots for grip let me choose the rope thickness, length, colors, and knot placement based on my riding style and my horse’s responsiveness. If you’re hands-on and love crafting things that are both beautiful and practical, this project is well worth the effort.
Why Choose Rope Reins With Grip Knots?
Rope reins offer a different feel compared to leather or web reins. I’ve always appreciated their flexibility and the way they communicate subtle cues directly to the bit or halter. The addition of grip knots provides extra control, especially when riding bareback, working in a hackamore, or handling a green horse.
Grip knots give your hands tactile markers. I can feel exactly where my hands are without needing to look down. They also help when riding in wet or cold weather when gloves reduce sensitivity or reins get slippery. The best part? Making DIY rope reins with knots for grip costs a fraction of what high-end reins sell for, and they can be just as effective.
Materials You’ll Need
Getting the right materials is crucial for both comfort and durability. After a few trial runs, I settled on a list that I now use every time I craft rope reins:
- 8 to 10 feet of rope (¼” to ½” diameter): Yacht rope or polyester braided rope works best. I prefer a soft rope that’s firm enough to hold a knot but comfortable in the hands.
- Scissors or a sharp blade: For clean cutting.
- Lighter or heat source: To melt the rope ends and prevent fraying.
- 2 snaps (optional): Scissor snaps or trigger clips for quick attachment to the bit or halter rings.
- Measuring tape: For determining rein length and knot spacing.
- Needle and strong thread (optional): For finishing touches or securing decorative wraps.
- Electrical or decorative tape (optional): To cover splices or reinforce ends.
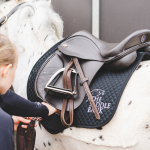
Choosing your rope color is part of the fun. I’ve made reins in bright neon for visibility on trails and earth tones for arena work. You can match them to your saddle pad, bridle, or even your riding clothes.
Deciding on the Length
Rein length depends on your riding style, your horse’s neck length, and how much slack you prefer. For example:
- Western riders may prefer 8–9 feet reins with more drape.
- English riders or those using split reins may need shorter lengths.
- Trail riders might want longer reins to allow relaxed, extended movement.
To get the right length, I loosely tied a rope to my bit rings and held it at my usual hand position while mounted. That helped me estimate the perfect amount of slack. After measuring, I added a few inches to account for knots and rope ends.
How to Make DIY Rope Reins With Knots for Grip
Once everything is ready, it’s time to start crafting. The process is straightforward and takes under an hour once you get the hang of it.
Step 1: Cut and Seal the Rope
Using scissors or a blade, I cut my rope to the desired length. After cutting, I melted the ends using a lighter to keep the rope from fraying. Holding the flame just close enough to soften the fibers, I carefully shaped the ends using a damp cloth for a cleaner finish. Make sure not to overheat, it can cause hard, sharp edges that irritate your hands.
Step 2: Attach the Snaps
Snaps are optional but make it easier to switch reins between bridles or halters. I slid the rope through the eye of each snap, folded it back 2–3 inches, and secured the fold with either a decorative whipping knot, stitching, or a tight wrap of electrical tape.
If you prefer a permanent rein, you can skip the snaps and use a lark’s head or figure-eight knot to tie directly to the bit rings or halter loops.
Step 3: Place and Tie the Grip Knots
The real magic behind DIY rope reins with knots for grip lies in this step. Grip knots serve as both visual and tactile markers. I spaced mine 10–12 inches apart, depending on the rein length and where my hands typically rest.
Here’s how I tied them:
- Choose the spot where you want the knot.
- Form a simple overhand knot around the main rope strand.
- Pull the knot snug, but not overly tight until you confirm the placement.
- Once satisfied, tighten it completely.
- Repeat on the opposite rein side, making sure the knots align evenly.
For a more decorative or bulkier grip, I sometimes use a double overhand knot or a blood knot, which adds more material for my fingers to grip.
I recommend riding with the reins once before fully committing to the knot placement. Move your hands around, simulate rein pressure, and adjust as needed.
Step 4: Test the Rein for Balance and Function
Before using the reins in a real riding session, I did a few practice runs, groundwork and slow riding exercises. I checked for:
- Even rein tension on both sides
- Comfortable spacing of grip knots
- Smooth sliding of the rope through my hands
- Sturdy attachment points
Any time something felt off, like one rein longer than the other, I remeasured and trimmed. It’s worth taking a few extra minutes to get it perfect.
Customizing Your Reins
Once the core function was locked in, I added a few finishing touches. Here are some ideas to personalize your DIY rope reins with knots for grip:
- Paracord wrapping near the snaps for color contrast
- Beads or charms (as long as they don’t interfere with your grip)
- Heat-shrink tubing over the rope ends for a clean professional look
- Leather tassels or fringe at the tail ends for a Western flair
Every pair of reins I make ends up being a little different. Some are bold and flashy, others are classic and understated. That’s the beauty of doing it yourself.
Benefits of DIY Rope Reins
I’ve tried just about every rein style out there, but rope reins with grip knots remain a favorite. Making them myself only adds to their appeal. Here’s why I keep going back to them:
- Affordability: I’ve made reins for under $15 that rival $60+ store options.
- Customization: Every knot is placed exactly where I want it.
- Durability: Good rope reins last for years with minimal care.
- Comfort: They’re soft in hand and easy on my horse.
- Maintenance: Toss them in a bucket of soapy water and they’re good as new.
Whether I’m working a green colt or heading out on a trail ride, these reins deliver consistent results. Knowing I built them myself makes each ride feel more connected.
Caring For Your Rope Reins
DIY rope reins with knots for grip are fairly low maintenance. However, a little care goes a long way. I follow this routine:
- Rinse off dust and sweat after long rides with cool water.
- Air-dry in the shade to prevent rope fading or hardening.
- Inspect the knots and snaps regularly to ensure nothing has come loose.
- Avoid harsh detergents that can weaken the rope fibers over time.
If knots shift or become loose, I just untie and reposition them. Rope is forgiving that way. For long-term storage, I coil them loosely and hang them in a dry place.
Tips From Experience
Over the course of making several reins, I’ve picked up a few lessons:
- Start with soft rope, some utility ropes are too stiff for reins and will never feel right in your hands.
- Use symmetry as your guide, the feel and function improve when both sides are balanced.
- Try reins before finishing, testing grip knot placement while mounted saves frustration later.
- Label your lengths and spacing once you find your favorite pattern. It makes future builds faster.
Every pair I make becomes a bit easier and more polished. The confidence that grows from these small projects builds into better horsemanship and a stronger bond with my tack.
Conclusion
Learning how to make DIY rope reins with knots for grip is a rewarding and useful project for any rider. Whether you’re aiming to save money, improve your control in the saddle, or express some personal flair in your tack, rope reins deliver on all fronts. With just a few tools and some thoughtful craftsmanship, you can build reins that are tailored to your exact riding needs.
These reins have become a staple in my tack room. They’re lightweight, functional, and stylish. Most importantly, they’re built by hand, with intention, care, and a little creativity. If you’ve never made your own tack before, rope reins are a great place to start. And once you ride with them, you might never go back to store-bought.